 KH Lab
Lab 1.1: Dendritic Spines
Overview
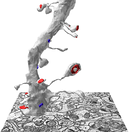
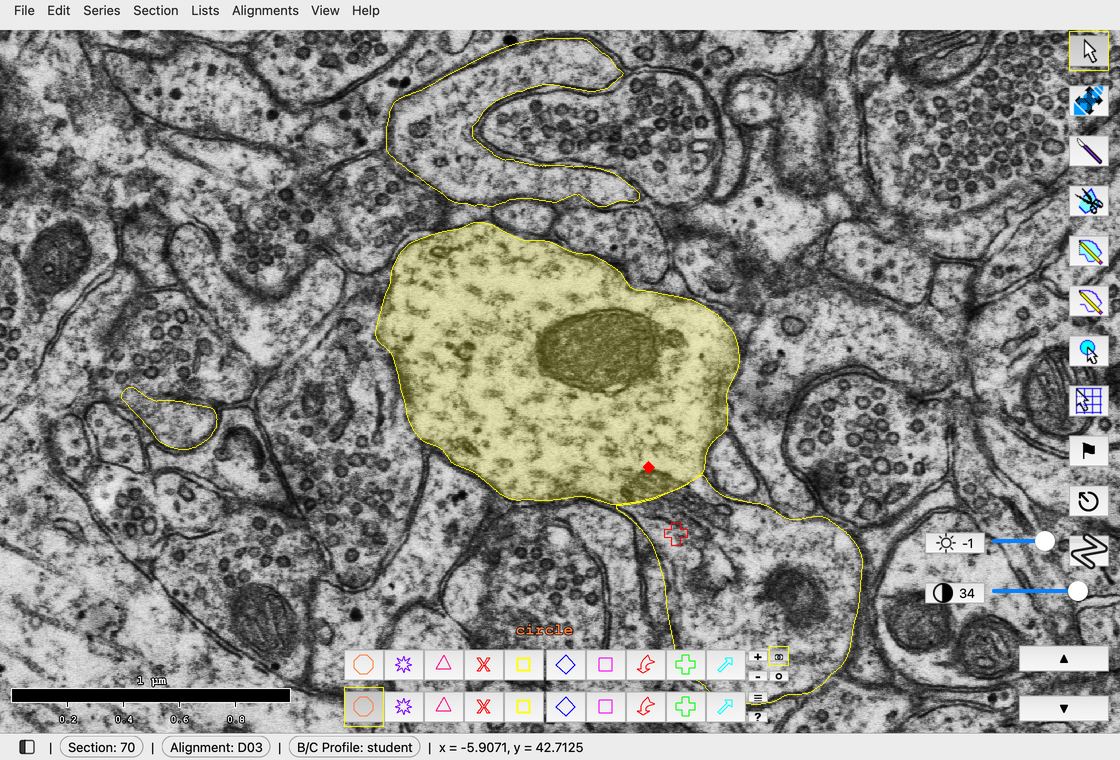
Reconstruct 3 dendritic spines, including one branched spine, from serial section electron micrographs. The dendritic shaft is already traced for you (d03, yellow).
Red triangle stamps mark where each spine begins, like a road sign at the start of a road. They are called protrusion stamps, or p-stamps, and are named d03p##. Your assigned p-stamps are d03p06, d03p32 and d03p47_branched.
These are the spines you will fully trace:
| Protrusion stamp name (p-stamp) | Spine trace name |
|---|---|
| d03p06 | d03sp06 |
| d03p32 | d03sp32 |
| d03p47_branched | d03sp47 |
At the end of the session, save and upload your .jser file to Canvas for attendance (see Saving and backups).
Find your p-stamps
The Object List shows every object in the series, so it is long. A filter shows only some of the objects.
- Go to Lists > Object list (Ctrl+Shift+O; Mac: Cmd+Shift+O). The Object List opens on the left of the window.
- Drag the right edge of the Object List until you can see the Groups column.
-
In the Object List, click Filter > Group filter....
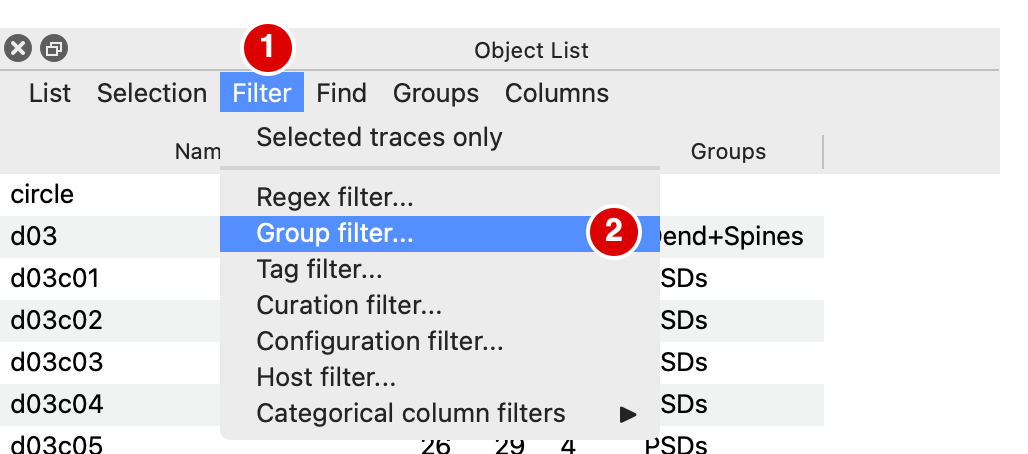
1: Filter. 2: Group filter... -
In the Group Filters dialog, open the list, choose Dend+Spines and click OK. The Object List now shows the dendrite d03, its p-stamps and the spines that are already traced. Your three p-stamps are in this list.
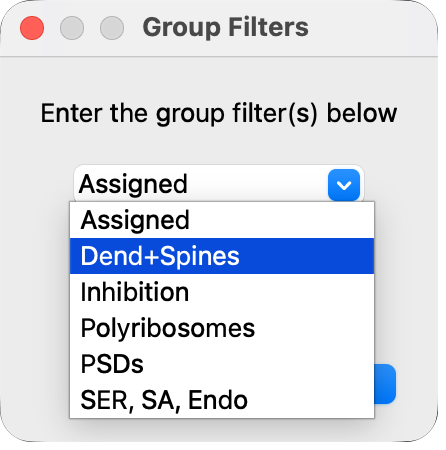
The Group Filters dialog.
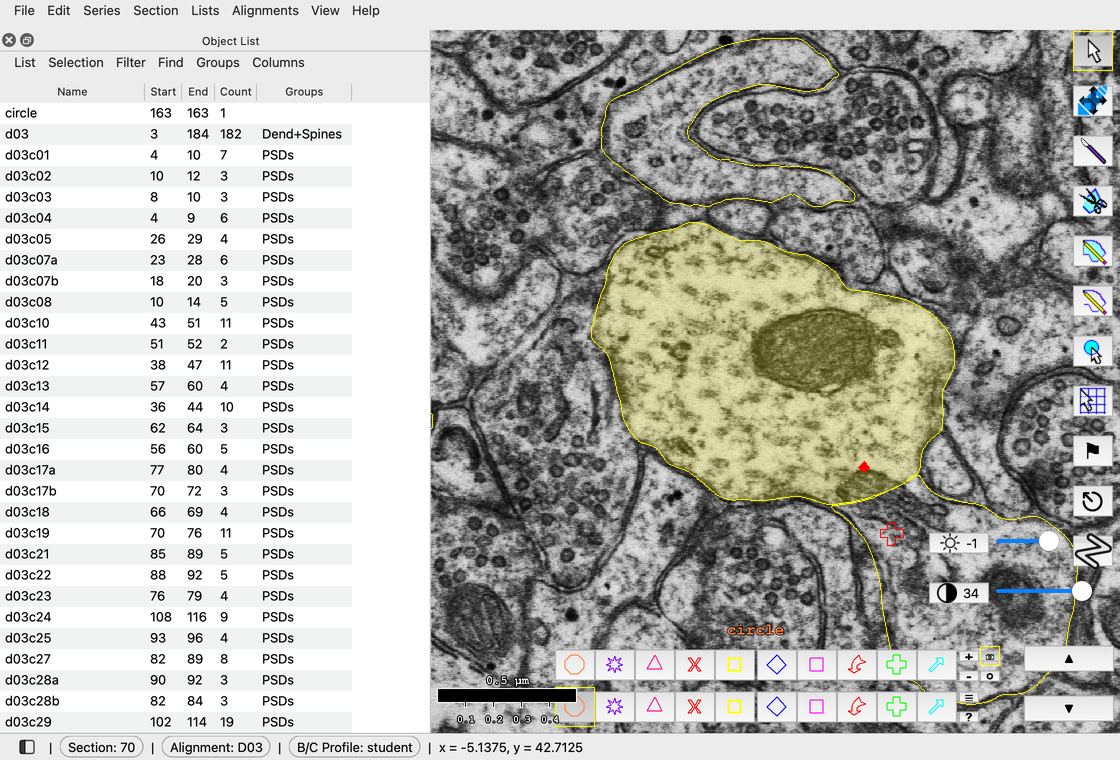
Filter > Group filter... > Dend+Spines > OK.
Now go to your first p-stamp: double-click d03p06 in the Object List. The view goes to the first section that has d03p06 (section 18) and centers on the stamp.
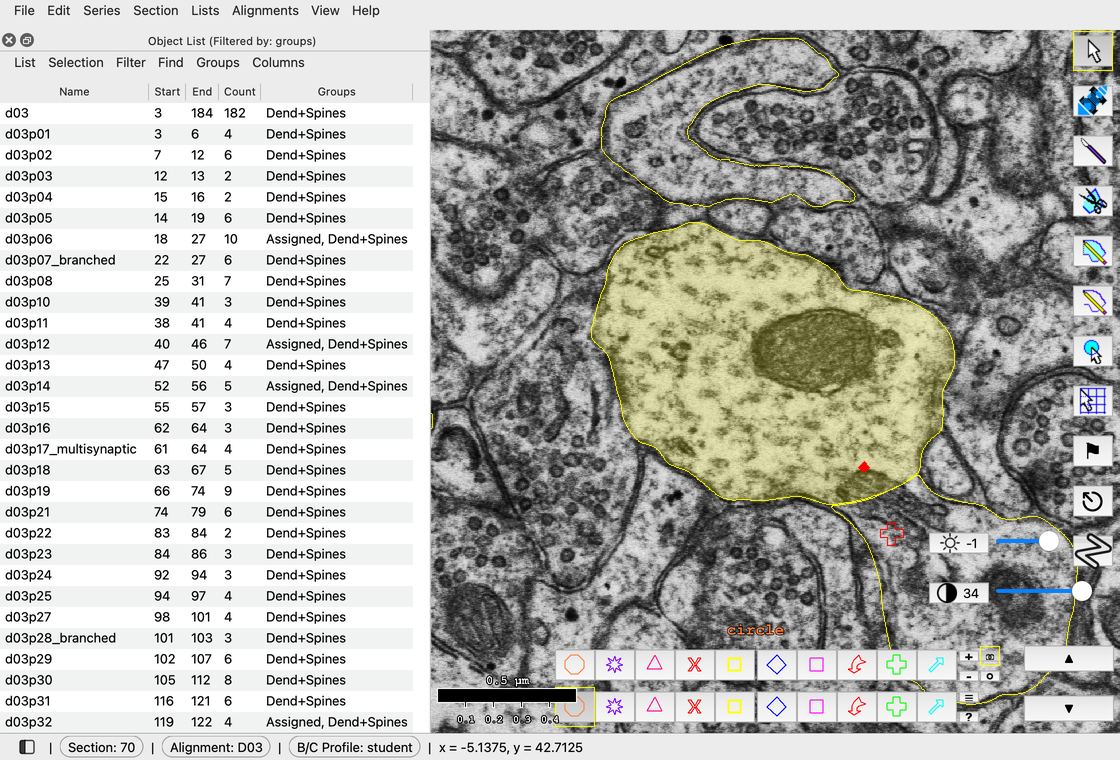
Double-click a p-stamp to go to the first section it is on.
Double-clicking an object in the Object List is the quickest way to find it again, especially after you have traced many objects.
Set up the trace palette
The trace palette is the two rows of squares at the bottom of the window. Each palette square holds a name, a color and a shape. A new trace or stamp takes these from the palette square that is selected.
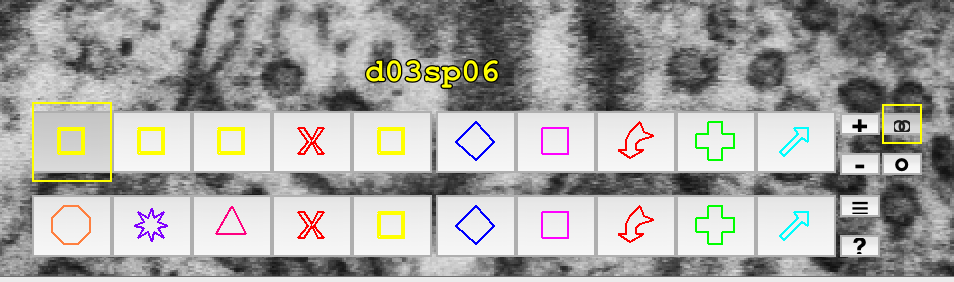
- Right-click a palette square. The Set Attributes dialog opens.
- Look at the Name, Color and Fill fields. They set how new traces and stamps made with this palette square look. Traces you already drew do not change.
- Click Cancel to close the dialog.
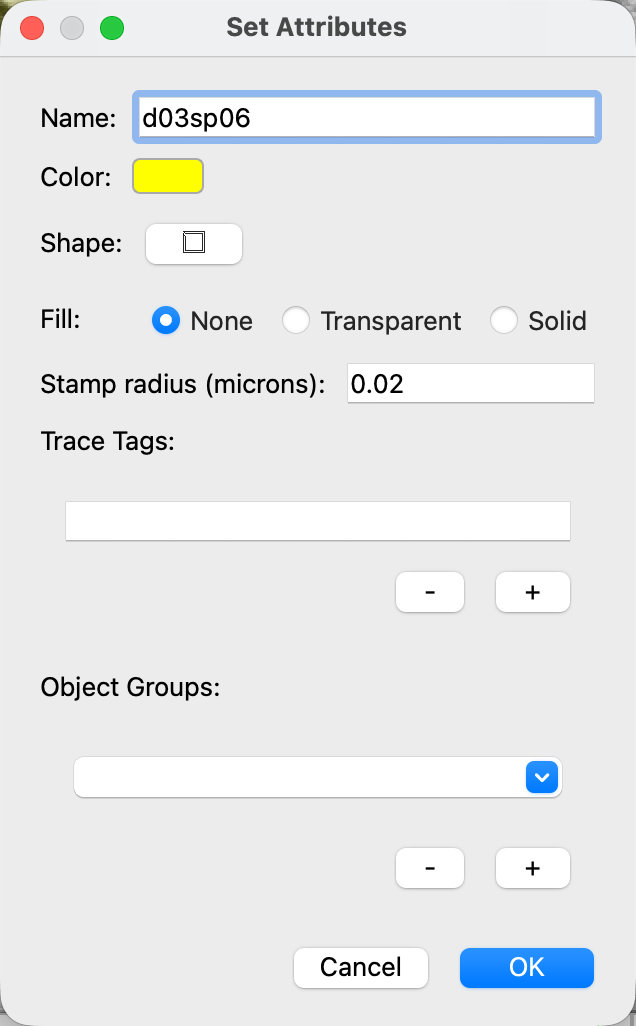
The palette squares for your spines (d03sp06, d03sp32 and d03sp47) are already set up for you. If one is missing, right-click an unused palette square, type its name in Name, choose yellow in Color, choose None in Fill, and click OK.
Warning
When you switch to a different spine, click that spine's palette square before you start tracing.
Set up the Closed Trace tool
Spines are traced with the Closed Trace tool  , which draws closed outlines.
- Click and drag to draw a trace freehand (Scribble).
- Click point by point to draw a polygon trace (Poly).
Warning
Do not use the Open Trace tool for spines. If you drew open traces by mistake, go to Lists > Trace list, select the open traces on that section, right-click and choose Set closed.
Set the tool up once:
- Right-click the Closed Trace tool in the tool palette. The Closed Trace Mode dialog opens.
- Under Mode, choose Combo. Combo lets you both scribble and click point by point.
- Under Closed Trace Shape, choose Trace. Spines are irregular, so a rectangle or ellipse does not fit them.
- Check Automatically merge overlapping traces, and leave Only merge selected traces checked. Each new piece you draw then joins the selected trace it overlaps, so you do not have to trace the whole outline in one go. This does the same thing as selecting the traces and merging them (Shift+M), with fewer keystrokes.
- Check Apply rolling average while scribbling. This smooths a scribbled trace when you let go of the mouse button, which helps if your mouse is sensitive or your hand is shaky.
- Type a number from 10 to 15 in the box next to it. Try a few values to see what works best for you.
- Click OK.
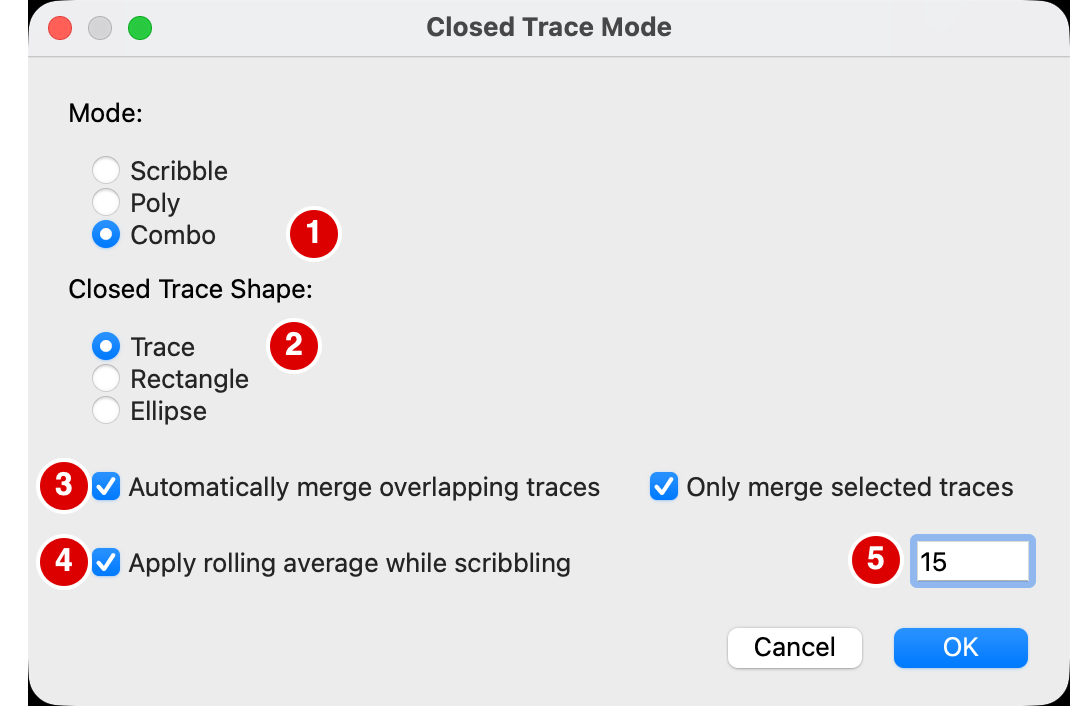
Right-click the Closed Trace tool, then set the settings in the order above.
Trace your dendritic spines
- Double-click d03p06 in the Object List to go to it.
- Click the d03sp06 palette square.
- Find where the dendrite membrane begins to bulge out, next to the p-stamp.
- Trace the outline of the spine with the Closed Trace tool.
- Go to the next section (Page Up) and trace the spine again. Go back with Page Down.
- Keep going, section by section, until you reach the spine head and its synapse.
- Finish one spine before you start the next. Then do d03p32 (d03sp32) and d03p47_branched (d03sp47) the same way.
Tip
One branch of d03p47_branched goes a long way. Ask your TA for help if you have trouble following it.
See your spines in a second Object List
Your new spine traces do not show in the first Object List. They are not in the Dend+Spines group that the list is filtered by. A second Object List, filtered by name, shows them.
-
Go to Lists > Object list (Ctrl+Shift+O; Mac: Cmd+Shift+O) again. The second Object List opens as a new tab beside the first.
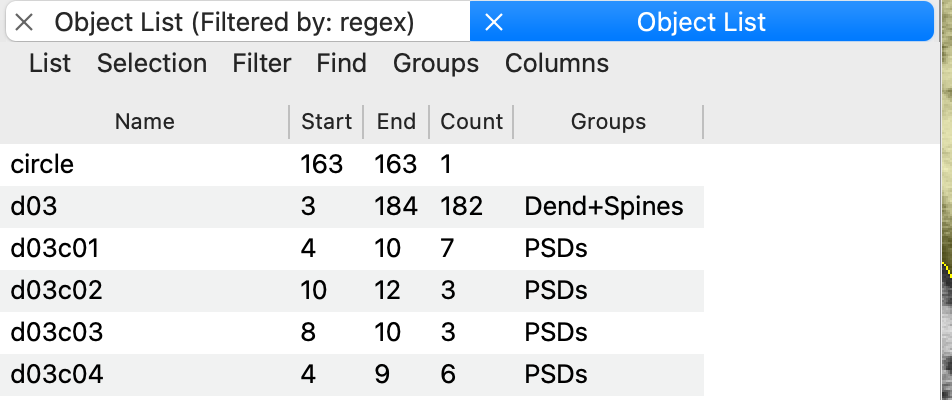
The second Object List opens as a tab. -
Drag the new tab down until the two lists sit one above the other.
-
In the second Object List, click Filter > Regex filter....
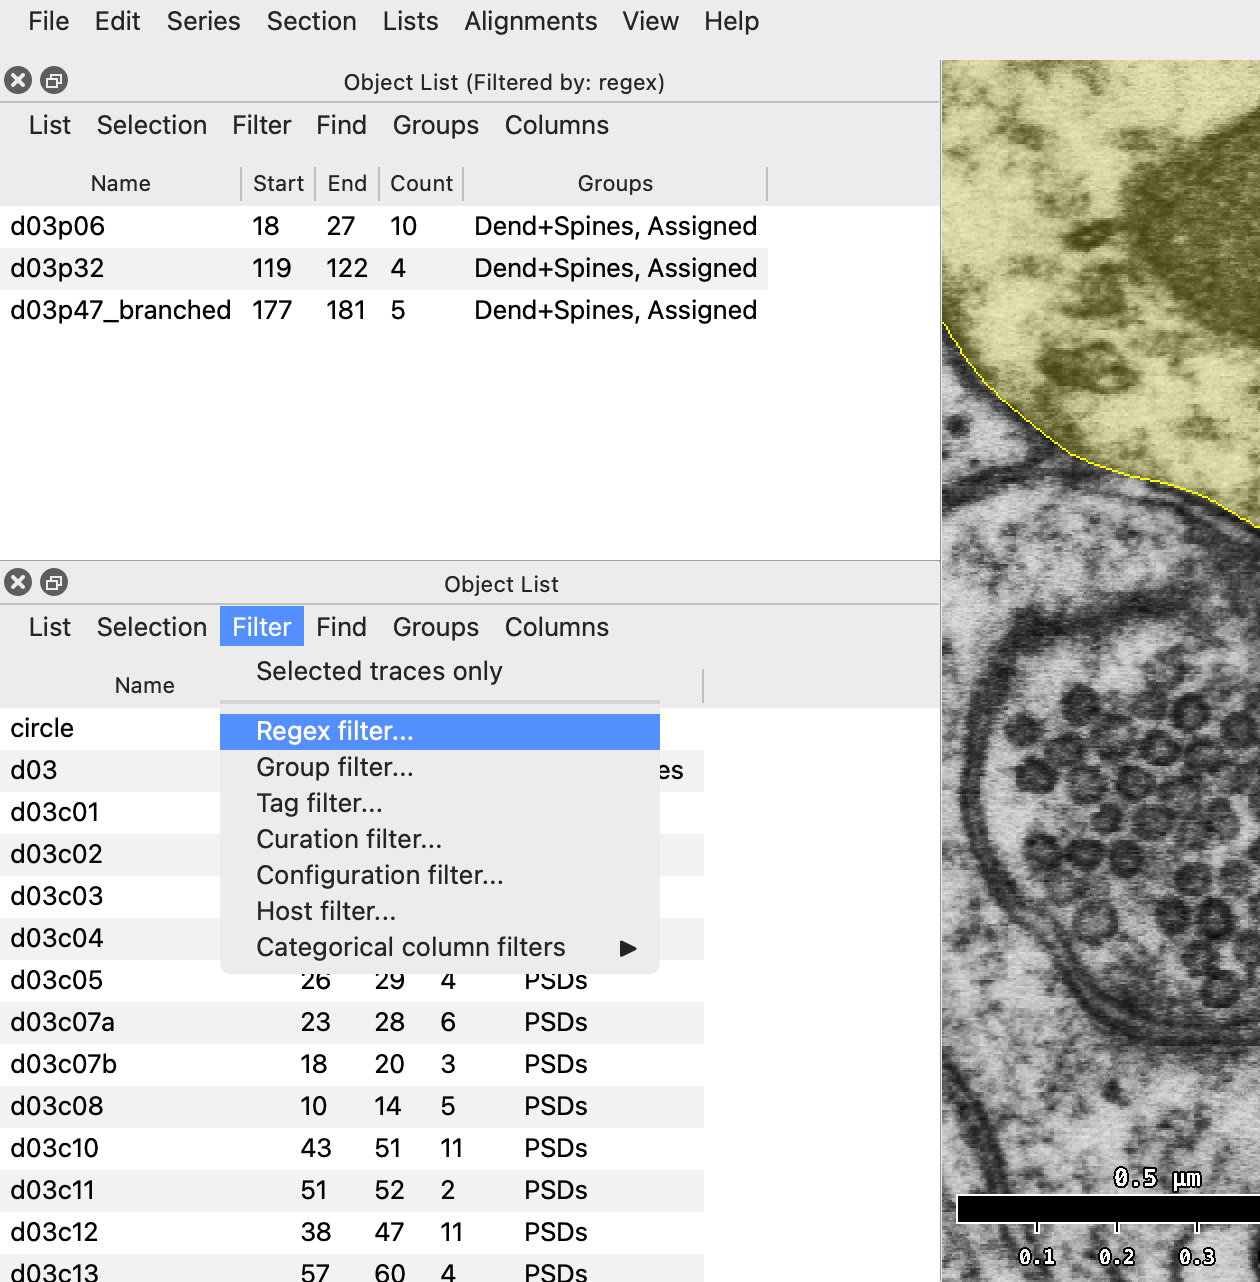
The two lists stacked, one above the other. -
In the Regex Filters dialog, replace
.*withd03sp.*. -
Click OK.
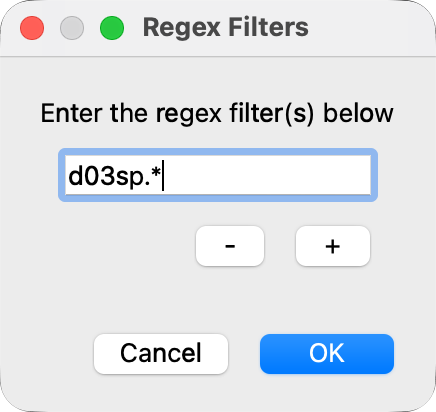
The Regex Filters dialog.
A regex (regular expression) is a pattern that names must match. In d03sp.*, the .* means "any characters", so the list shows every name that begins with d03sp: the spines that were already traced, plus yours.
3D reconstruction
When your spines are done, view them in 3D with the dendrite.
- In the Object List, right-click d03 and choose 3D > Add to scene. A 3D scene window opens.
- Right-click d03sp06 and choose 3D > Add to scene.
- Do the same for d03sp32 and d03sp47.
A faster way: click an object in the Object List, then hold Shift and double-click it.
Saving and backups
- Save with Ctrl+S (Mac: Cmd+S) when you finish, and often while you work.
If the program crashes before you save, open the series again. PyReconstruct asks "An unsaved version of this series has been found. Would you like to open it?" Click Yes to get your work back.
Attendance
At the end of every work session, make a backup of your .jser file with File > Backup > Backup now... (Ctrl+Shift+B; Mac: Cmd+Shift+B). You do not need to back up the image files, because they do not change. The .jser file MUST BE UPLOADED TO CANVAS TO GET CREDIT FOR CLASS ATTENDANCE. To upload, go to Canvas: Assignments > Attendance.
PyReconstruct can also save a backup every time you save. Go to File > Backup > Settings..., check Auto-backup (create backup on every save), and choose a Backup Folder.
Tips
Some useful tips to learn as you become more familiar with PyReconstruct:
Tip 1
Press / to flip back and forth between this section and the last one you viewed. Press the space bar to blend the two on screen, and press it again to stop.
Tip 2
To trim part of a trace, use the Knife tool (K). Select the trace you want to trim first. The knife cuts traces of only one object at a time, so deselect traces of other objects.
Tip 3
Press ? at any time for a list of keyboard shortcuts (Help > Shortcuts list). The 3D scene window has its own shortcuts list for moving the 3D scene; press ? there too.