 KH Lab
PyReconstruct Guide
Overview
PyReconstruct is a modern update of Reconstruct, a program developed in the lab of Prof. Kristen Harris. PyReconstruct was developed by Harris Lab members Julian Falco and Michael Chirillo in 2022-2025, with input from your TAs, written entirely in Python. PyReconstruct allows users to trace and annotate images, thereby creating 3D reconstructions.
In PyReconstruct, you can view and trace a series of sequential images, known as "serial sections". The section is the individual image and the series is the whole set of sections. The series is like a book, and the sections are the pages. Just like the pages of a book, each section is numbered.
You can create 3D images in PyReconstruct by tracing an object on one section, going to the next section, tracing the object again, and so on, until you have traced the object on every section. PyReconstruct combines your traces into a 3D reconstruction.
Reconstruct has been used to reconstruct anatomical structures in 3D including brain cells, blood vessels, the ant brain, human fetal bones, a sea lily, a fish fossil, metal alloys, tree bark, and spider genitalia. On Prof. Harris's lab website, SynapseWeb, you can check out the many uses of Reconstruct. This video, "Cruise through the Hippocampal Neuropil: Brain Cells Visualized," is a cool example of what Reconstruct can do.
Installing and opening your series
To install PyReconstruct, download the class dataset, and open your series for the first time, follow Getting started.
To open a series after that:
- Go to File > Open series... (Ctrl+O; Mac: Cmd+O).
- Select the .jser file of the series you want to open.
- If PyReconstruct says "Images not found. Would you like to locate them?", click Yes and choose the folder that holds the series images.
PyReconstruct files
A series has 2 kinds of files: the images and the .jser file. The images are what you look at and trace. The .jser file holds all the series and trace information. It does not hold the images.
How to make a trace
1. Choose the name and color for your trace
- Right-click a square in the trace palette. The Set Attributes dialog opens.
- Type a name, pick a color, and click OK.
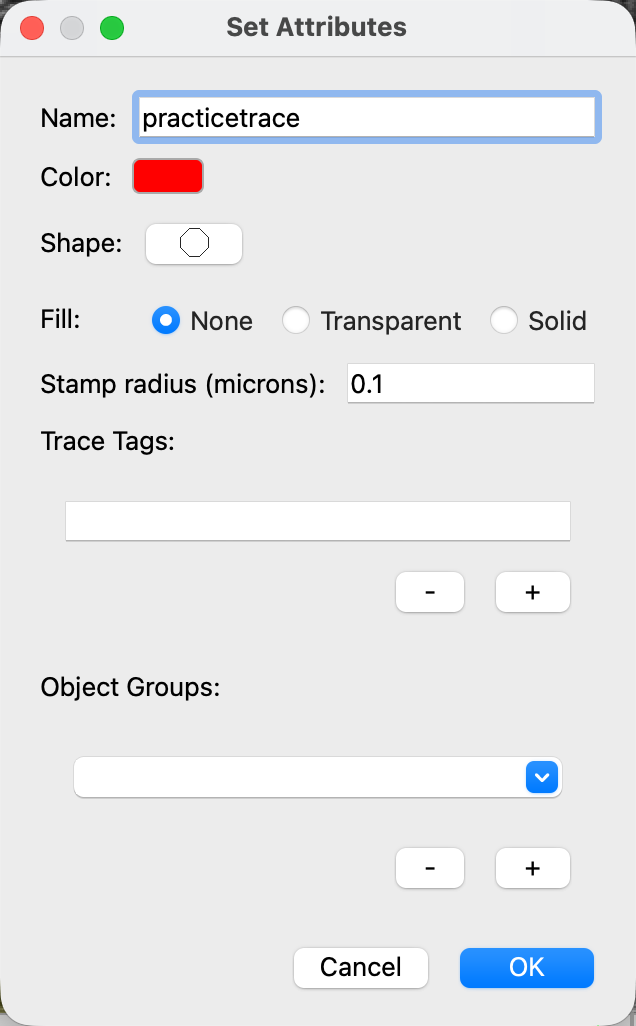
Right-click a palette square, type a name, and click OK.
2. Make a trace
- Choose an object to trace.
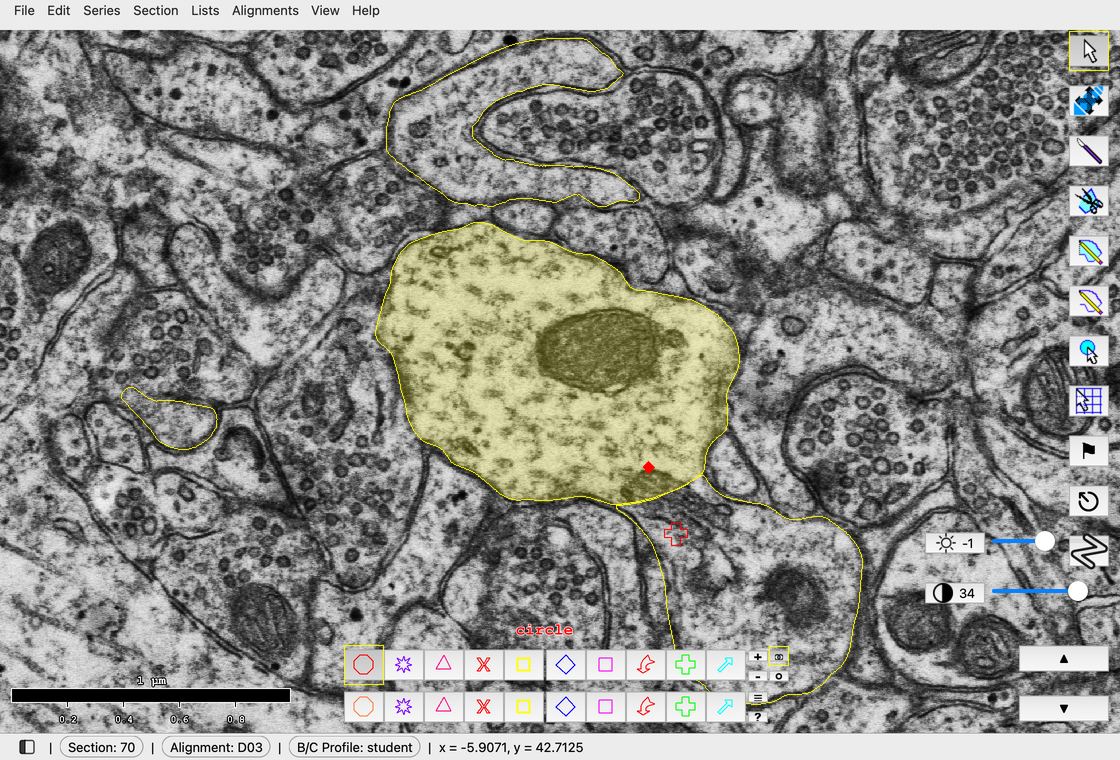
- Trace continuously: with the Closed Trace tool, hold down the left mouse button and carefully drag around the outline of the object. Let go when you are done.
- Trace point by point: with the same tool, click (rather than holding the button down), and keep clicking to add points around the object. Right-click when you are done.
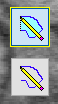
- The top tool (Closed Trace) draws circles and other closed shapes. The bottom tool (Open Trace) draws lines and other open shapes. Both can draw continuously or point by point.
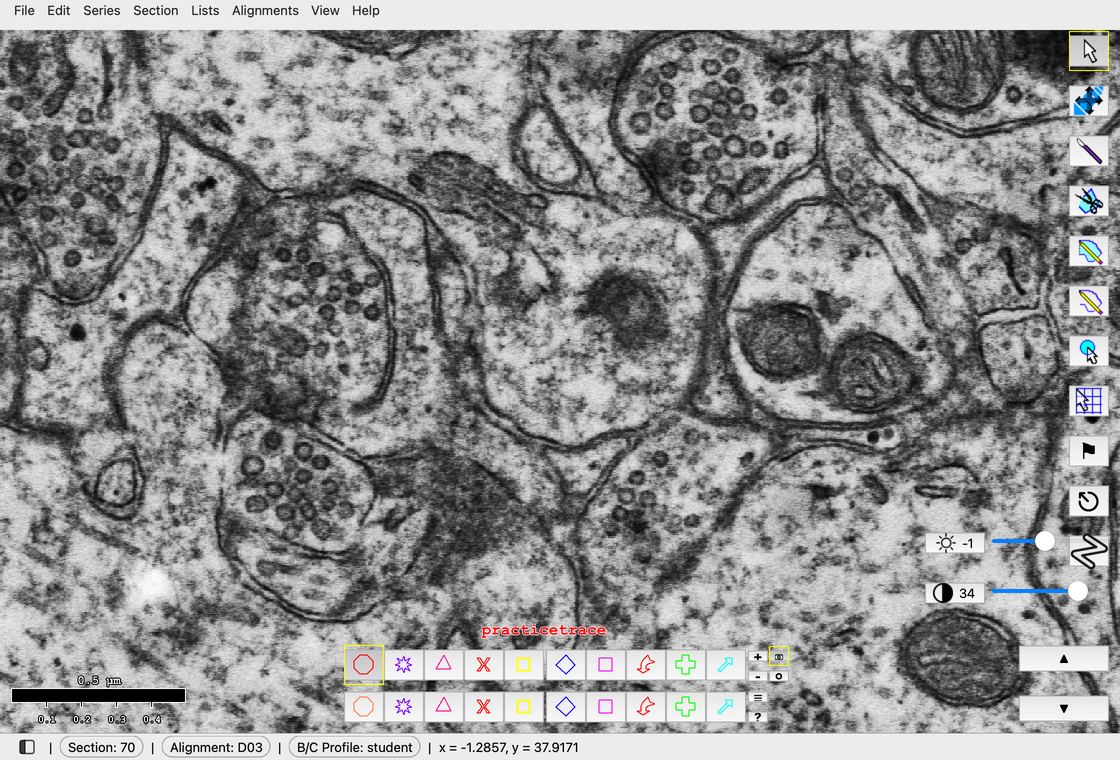
Hold the left button, drag around the object, and let go.
How to move the image
While tracing, you will need to move the image or zoom in and out. In the Tools window, click Pan/Zoom:

Hold down the left button and move the mouse to move the image left, right, up, and down. Hold down the right button and move the mouse toward or away from you to zoom in and out.
How to make a 3D reconstruction
1. Make traces in more sections
- Go to the next section (Page Up) or the previous section (Page Down). The scroll wheel and the paging tool in PyReconstruct do the same:
- Trace the same object that you just traced, with the same name, for example
practicetrace. - Go to the next section and trace your object again.
- You can do this for a few more sections if you want. You need to trace an object on at least two sections to reconstruct it in 3D.
Note
All traces with the same name are grouped together as one object.
2. Make a 3D reconstruction
- Go to Lists > Object list (Ctrl+Shift+O; Mac: Cmd+Shift+O). The Object List opens.
- Find your object named
practicetrace. The list is in alphabetical order, so you might need to scroll down. - Right-click
practicetraceand choose 3D > Add to scene.
Trace palette
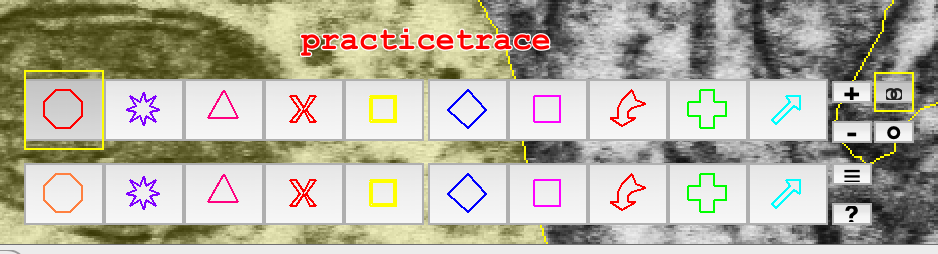
From the trace palette, you can select the color, name, and shape of the trace you want to make. Here is the trace palette:
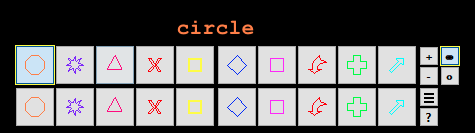
Right-click any palette square to change its name, color, shape, fill, stamp radius, trace tags, and the object groups a new object joins. You can set up your palette in advance, then click the palette square you need for each kind of trace you make.
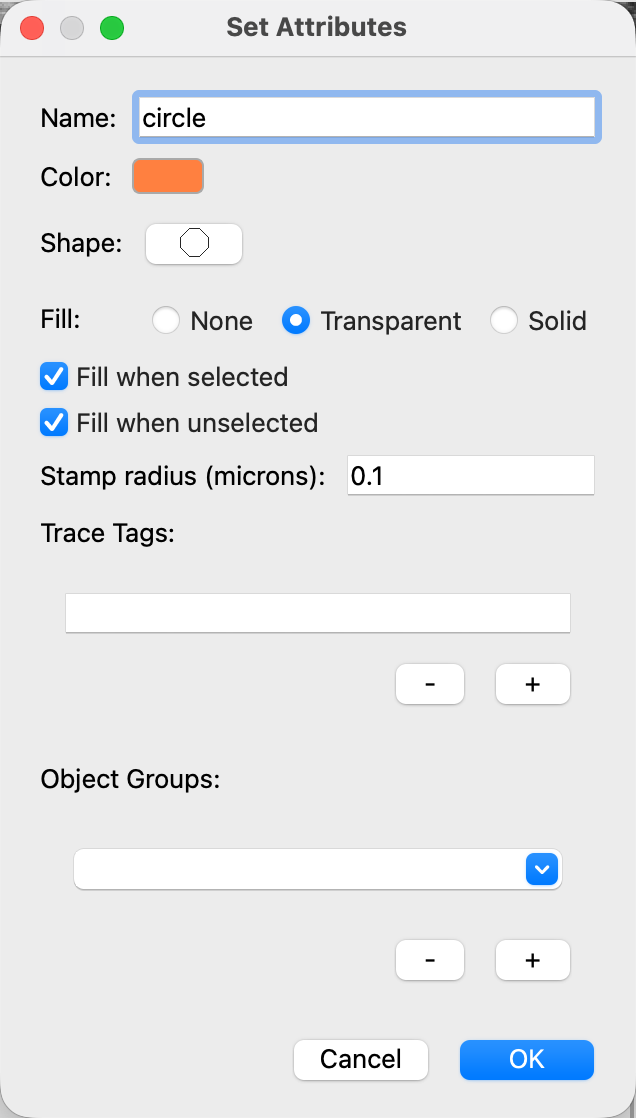
Choose the name and color for your palette square
- Right-click a palette square. The Set Attributes dialog opens.
- Name: type a name for your trace.
- Color: click the colored square, pick a color, and click OK.
- Only if you want the trace filled with color:
- Fill: choose Transparent or Solid, depending on how opaque you want the fill.
- Check Fill when selected or Fill when unselected as needed.
- Shape: click to change the shape of the stamp.
- Stamp radius (microns): the size of the stamp, in micrometers (µm).
- Click OK.
Tip
You can drag the trace palette to another place in the window.
Tools window
In the Tools window, you can select tools for tracing, viewing, and measuring. Here is the Tools window:
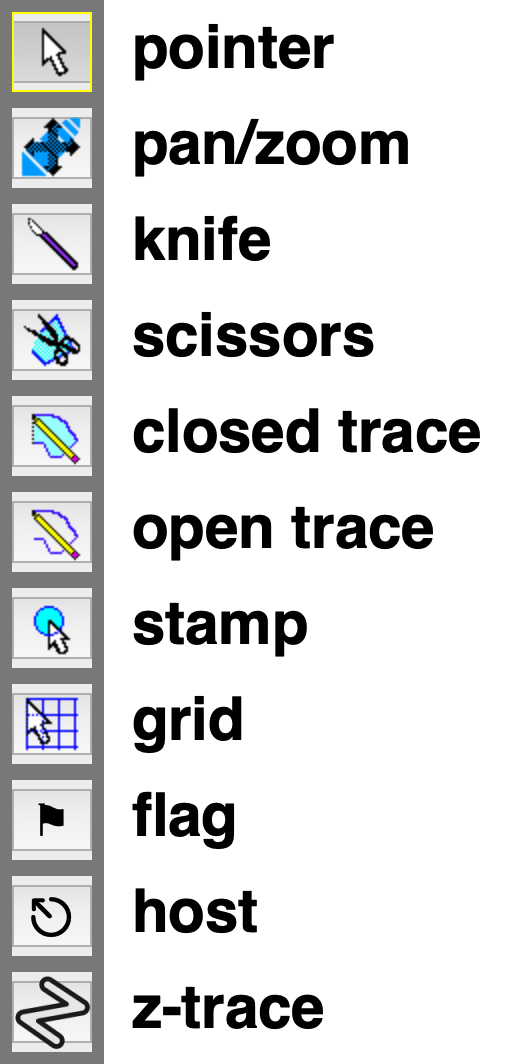
There are a few more tools that you won't need to use in this class. Here are the ones to focus on:
| Name | What it does and how to use it |
|---|---|
| Pointer | Selects and deselects traces. Select: click on or near the trace. Deselect: click on or near the selected trace again. Ctrl+A (Mac: Cmd+A) selects all traces; Ctrl+D (Mac: Cmd+D) deselects all traces. |
| Pan/Zoom | Moves the image and zooms. Hold down the left button and move the mouse to move the image. Hold down the right button and move the mouse toward or away from you to zoom in and out. |
| Knife | Cuts a trace into pieces. Select the trace first, then drag the knife across it. You can select more than one trace, but they must all belong to the same object. |
| Scissors | Changes part of a trace. Click the trace where you want the change to start. Press Backspace to remove points back along the trace, trace the new edge, then right-click to finish. |
| Closed Trace | Tracing tool that joins the two ends of the trace for you: it makes a closed trace. Continuous trace: hold down the left button to trace, and let go to end the trace. Point-by-point trace: click once to start. Click to add more points, and right-click to end the trace. |
| Open Trace | Tracing tool that does not join the ends of the trace: it makes an open trace. Continuous trace: hold down the left button to trace, and let go to end the trace. Point-by-point trace: click once to start. Click to add more points, and right-click to end the trace. To draw a straight line, click at the start point, click again at the end point, then right-click to finish. To measure a length, click to start a line without finishing it: the length shows in the status bar at the bottom left of the main window, next to Line distance. |
| Stamp | Places a stamp in the shape of the selected palette square. Right-click the palette square to set its stamp radius. Click to place a stamp. Click and drag to make a stamp of the size you want. |
Tip
You can drag the Tools window to another place in the window.
How to use the keyboard
These are some of the most important shortcuts.
- ? (Shift+/): List all the shortcuts.
- Delete or Backspace: Delete the selected traces.
- Page Up: Go to the next (higher) section.
- Page Down: Go to the previous (lower) section.
- Space: Blend the current section with the last section you viewed. Useful when comparing two sections.
- /: Switch back and forth between the current section and the last section you viewed. Hold / to flicker. Useful when comparing two sections or picturing the sections in 3D.
- Ctrl+A (Mac: Cmd+A): Select all traces on the section.
- Ctrl+C (Mac: Cmd+C): Copy the selected traces.
- Ctrl+D (Mac: Cmd+D): Deselect all traces on the section.
- Ctrl+E (Mac: Cmd+E): Edit the attributes of the selected trace.
- Ctrl+F (Mac: Cmd+F): Find an object in the series. (Or open Lists > Object list (Ctrl+Shift+O; Mac: Cmd+Shift+O), select the object, and choose Find > Go to first contour or Find > Go to last contour.)
- Shift+G: Copy the attributes of the selected trace onto the selected palette square.
- Shift+H: Hide the selected traces. To hide every trace in the series: Series > Hide > Hide all traces (entire series).
- H: Turn on or off hiding all traces for now. A red outline around the field means all traces are hidden, even if you change sections. The traces come back when you press H again.
- A: Turn on or off showing all traces for now. A green outline around the field means all traces are shown, even if you change sections. Hidden traces go back to hidden when you press A again.
- Shift+M: Merge the selected traces into one. They must be closed traces, overlap, and have the same name.
- Ctrl+O (Mac: Cmd+O): Open a series.
- Ctrl+Shift+O (Mac: Cmd+Shift+O): Open the Object List.
- Ctrl+S (Mac: Cmd+S): Save.
- Ctrl+U (Mac: Cmd+U): Unhide all hidden traces on this section. To unhide every trace in the series: Series > Hide > Unhide all traces (entire series).
- Ctrl+V (Mac: Cmd+V): Paste traces into the section.
- Ctrl+X (Mac: Cmd+X): Cut the selected traces from the section, to paste later.
- Ctrl+Y (Mac: Cmd+Y): Redo.
- Ctrl+Z (Mac: Cmd+Z): Undo.
- Backspace (while tracing): Delete the last point you placed while making a trace or using the scissors.
- Ctrl+1 to Ctrl+0, Ctrl+Shift+1 to Ctrl+Shift+0 (Mac: Cmd+1 to Cmd+0, Cmd+Shift+1 to Cmd+Shift+0): Open Set Attributes for trace palette squares 1 to 20.
- Ctrl+Shift+V (Mac: Cmd+Shift+V): Paste attributes. Copy a trace (Ctrl+C; Mac: Cmd+C), select another trace, and press Ctrl+Shift+V (Mac: Cmd+Shift+V) to give it the first trace's name, color, and other attributes.
How to use the mouse
Click to select and deselect traces. You must click close to the trace, but not exactly on it.
Right-click a selected trace and choose Trace > Edit attributes... to edit its attributes (or press Ctrl+E; Mac: Cmd+E).
In the Tools window, make sure you are familiar with Pan/Zoom. With Pan/Zoom selected, hold down the left button and move the mouse to move the image. Hold down the right button and move the mouse toward or away from you to zoom in and out.
Status bar
The bottom left of the main window is the status bar:

From left to right, the status bar shows:
- Section: the number of the section you are viewing.
- Alignment: which alignment the series is in (used when a series has more than one alignment).
- B/C Profile: which brightness/contrast profile is in use. You can click Section, Alignment, or B/C Profile to change it.
- Position: the x-y coordinates of the cursor.
- Closest trace: the name of the trace closest to the cursor.
- Line distance: the length of the line while you draw it with the Open Trace tool.
Object List
To open the Object List, go to Lists > Object list (Ctrl+Shift+O; Mac: Cmd+Shift+O).
You can filter the Object List: in the Object List, go to Filter > Regex filter...
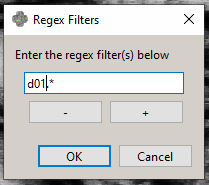
The filter uses regular expressions (regex), a way to describe a pattern of names. Replace the .* in the box with d01.* to see all objects whose names start with d01. A period (.) stands for any one character, and .* stands for any run of characters. # stands for one digit, and #+ stands for a whole number.
To choose which columns are listed, use Columns > Set columns... in the Object List:
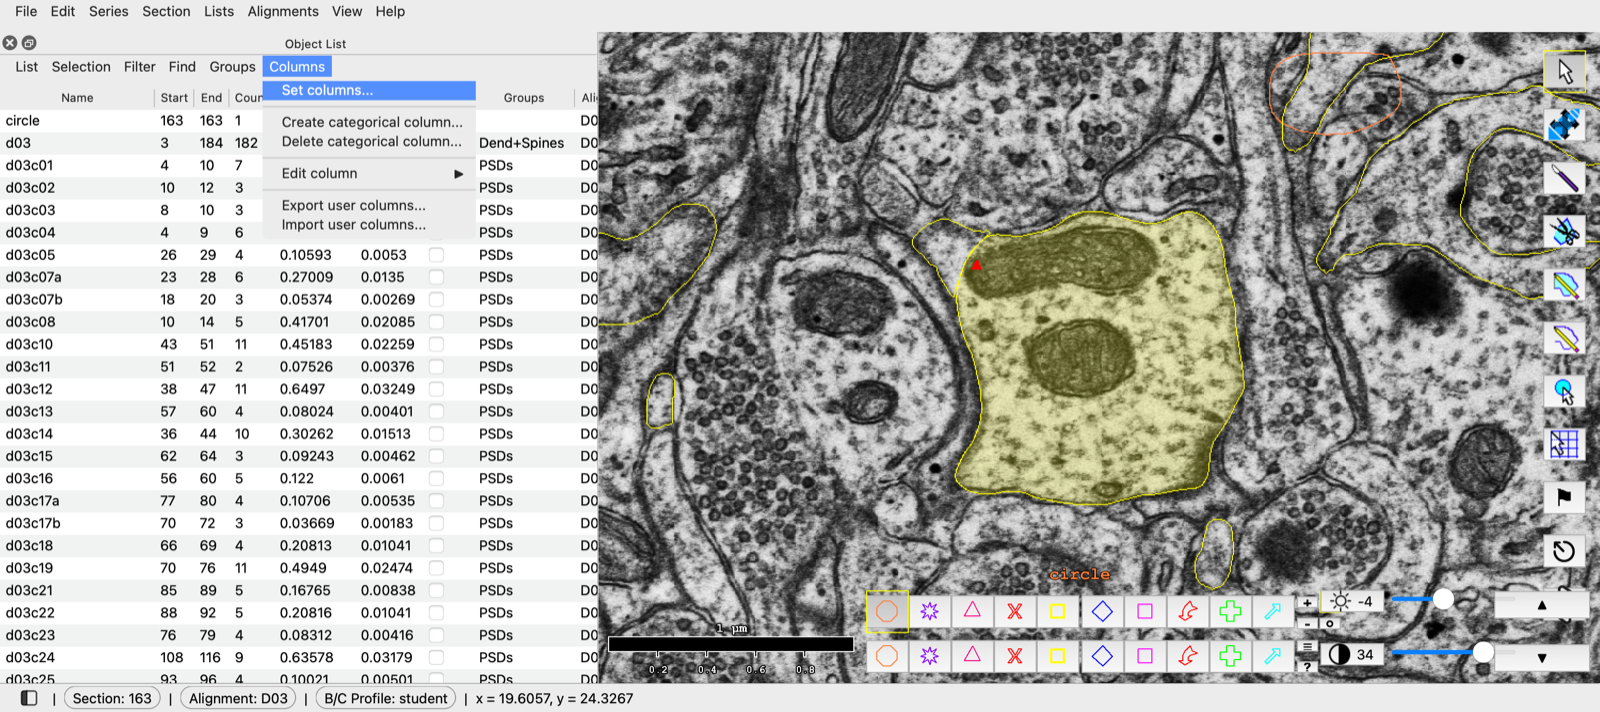
There are many column options. Choose the ones you want to see in your Object List.
3D object viewer
In the Object List, right-click an object name to add it to the 3D scene, remove it, or change how it looks in 3D. To add an object, right-click it and choose 3D > Add to scene.
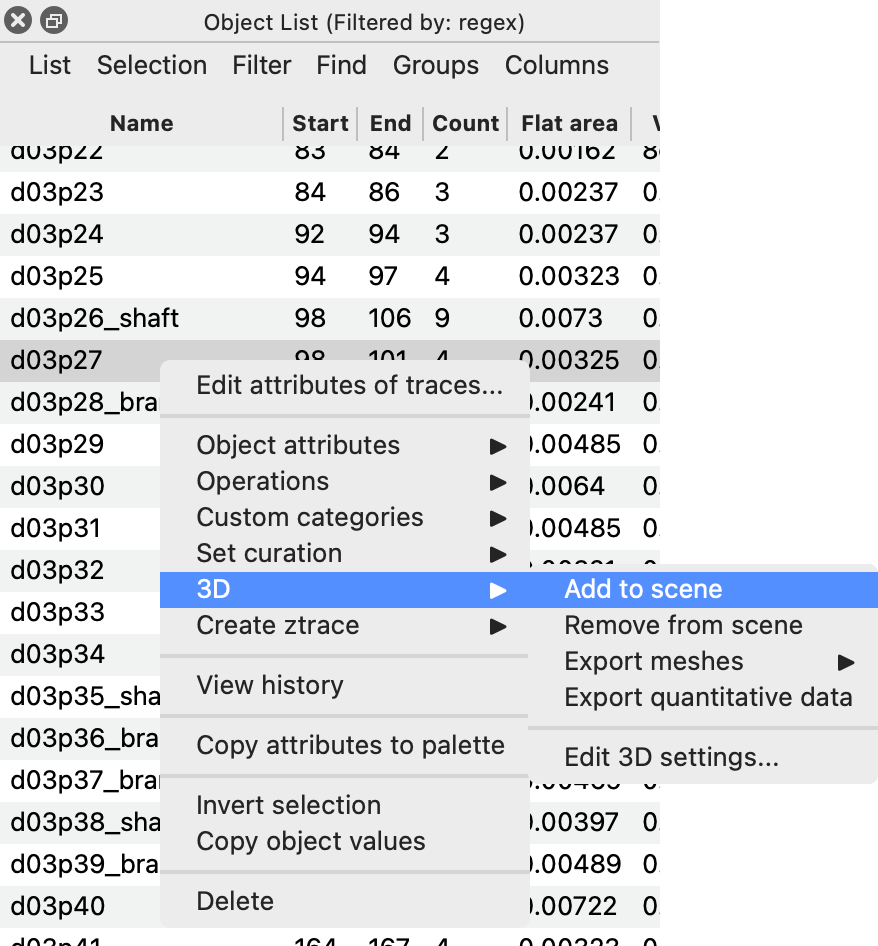

Right-click > 3D > Add to scene, then drag in the 3D window to turn the view.
Zoom in and out with the scroll wheel. Hold the left button and move the mouse to spin the view. To spin around a different object, click it to select it and press F (Scene > View > Center on selected).
In the 3D scene, put your cursor over an object to see its name and the section number. Double-click the object to go straight to that spot in the 2D image. This is very useful for finding errors in the 3D and going straight to the trace that needs fixing.
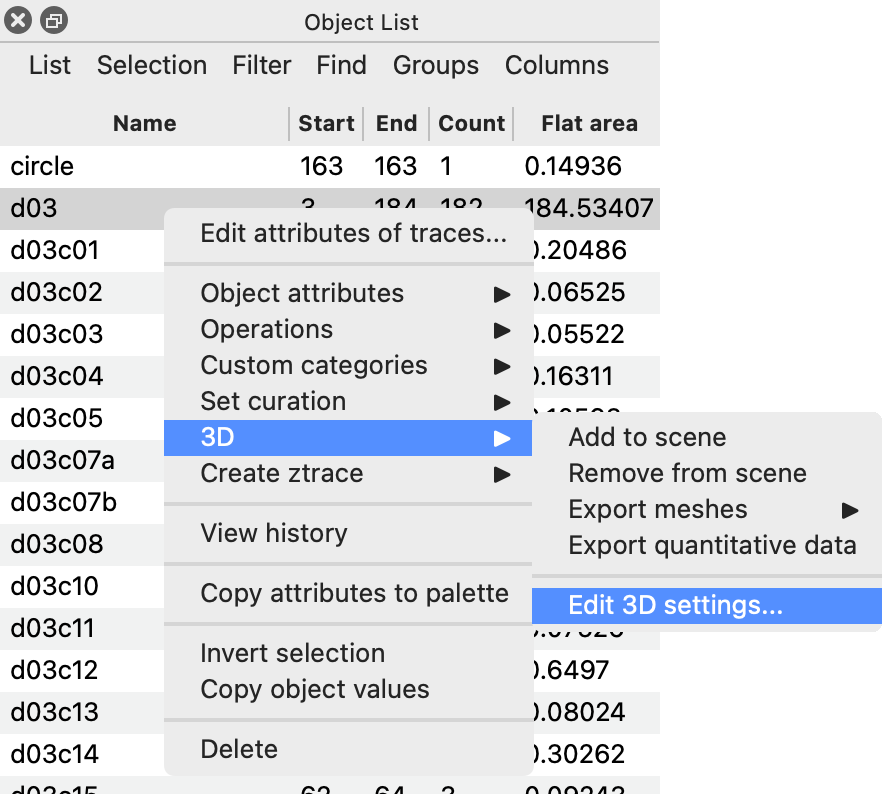
To change how an object looks in 3D, right-click it in the Object List and choose 3D > Edit 3D settings...:
Here you can set 3D Type (surface, spheres, or contours) and Opacity (0-1): 1 is solid and 0.1 is nearly clear.
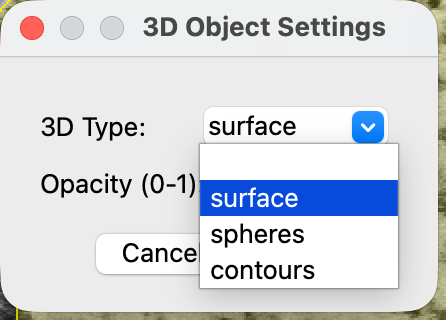
Opacity changes right away. To see a new 3D type, use Scene > Reload selected in the 3D window.
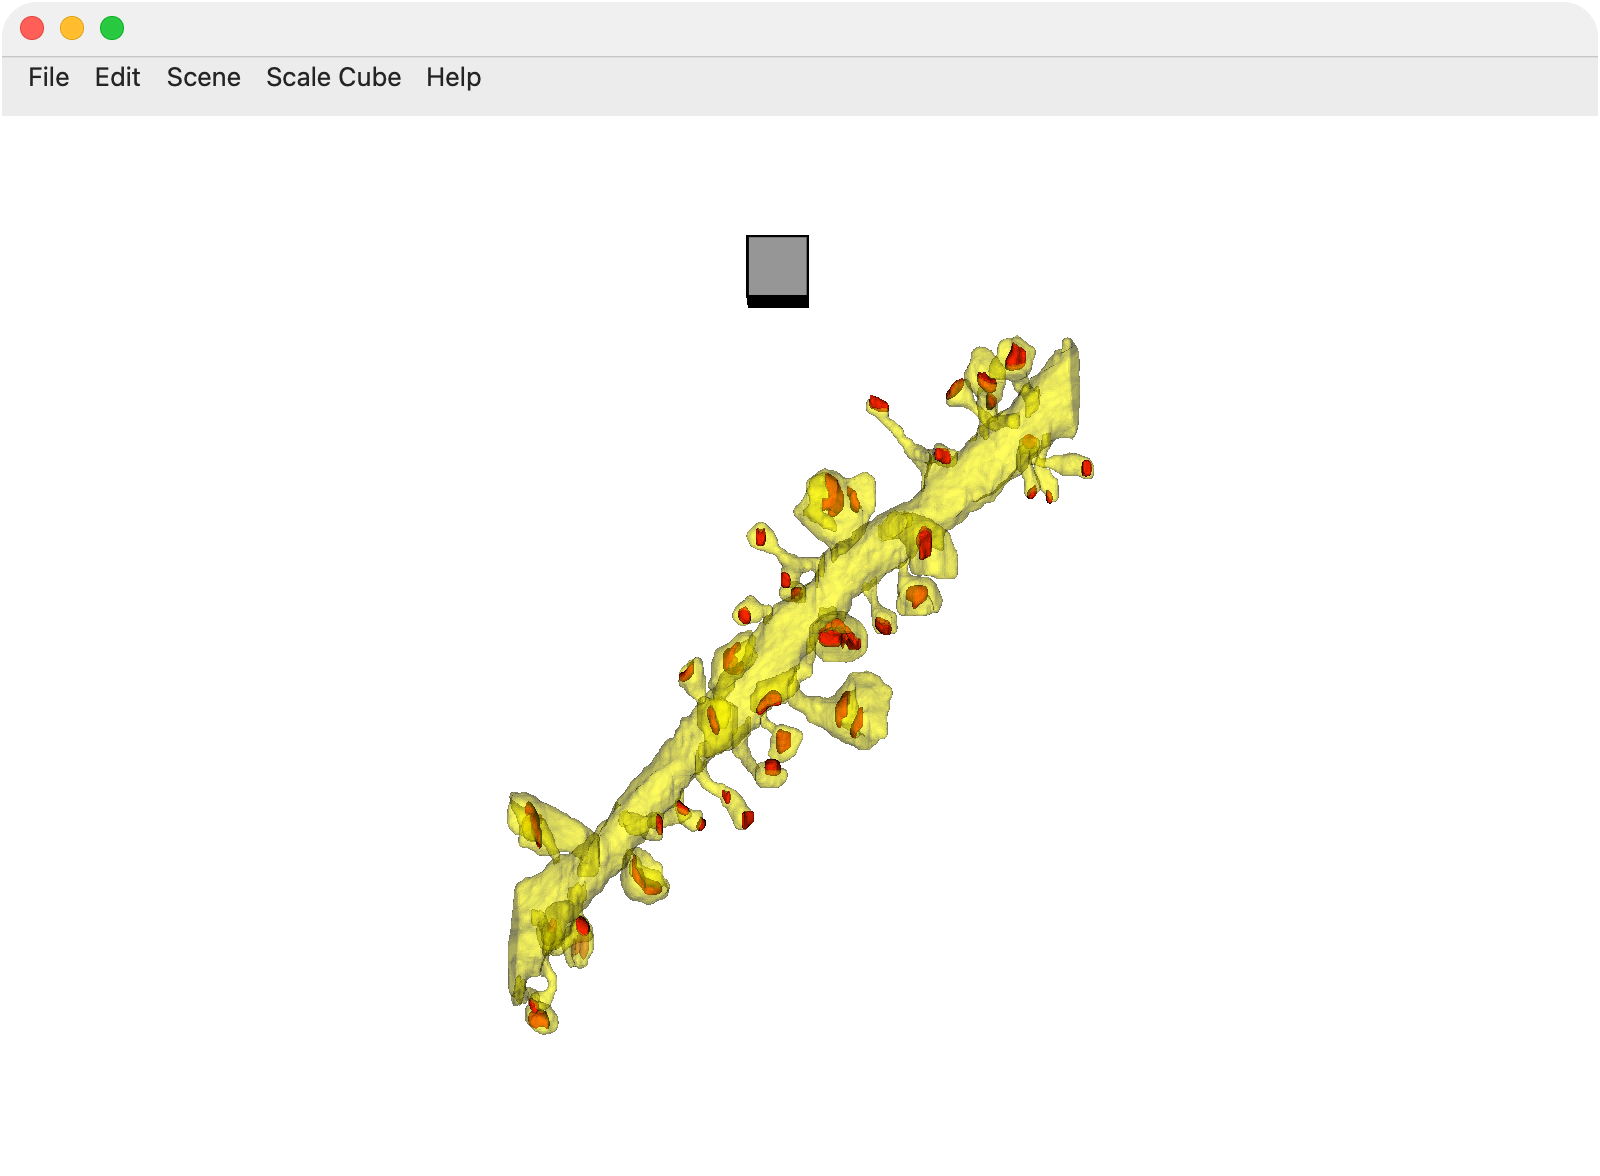
Get to know the menus of the 3D window: File, Edit, Scene, Scale Cube, Help. From these you can add a scale cube to your scene and more. Help > Shortcuts (or ? with the 3D window active) lists the 3D keys.
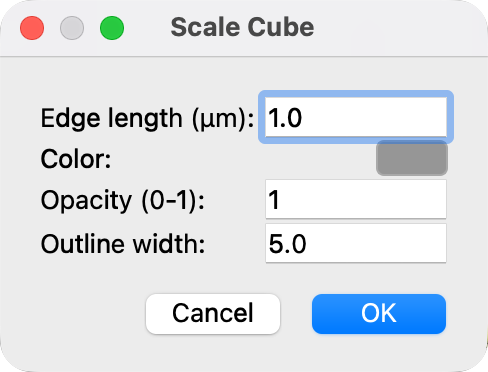
To add a scale cube, use Scale Cube > Display in scene (or press C). Click the cube so it is the only thing selected, then press Ctrl+E (Mac: Cmd+E) to set its Edge length (μm), color, opacity, and outline width:
Move selected objects or the cube in x with the left and right arrows, in y with the up and down arrows, and in z with Ctrl+Up and Ctrl+Down (Mac: Cmd+Up and Cmd+Down).
Arrange a 3D figure from the keyboard
The 3D window can be arranged without the mouse. With the 3D window active:
- Add every object you want in the figure to the scene.
- Press Ctrl+A (Mac: Cmd+A) to select all objects in the scene.
- Press F to center the view on the selected objects.
- Press X, Y, or Z to look along that axis. Shift+Left/Right, Shift+Up/Down and Ctrl+Shift+Up/Down (Mac: Cmd+Shift+Up/Down) rotate the selected objects.
- Press C to show the scale cube (1 μm on each side unless you change it). It appears in the center of the scene.
- With your objects still selected and the cube not selected, move the objects away from the cube with the arrow keys.
- Press Ctrl+D (Mac: Cmd+D) to deselect everything, so the objects show only the colors and opacity you set.
- Go to Scene > Save scene screenshot..., type a file name, and save.
Moving traces
Move selected traces with the arrow keys; hold Ctrl (Mac: Cmd) for small steps or Shift for large steps. Make sure a trace is selected first. You can also drag a selected trace to where you want it.
Saving
PyReconstruct asks you to save when you quit. Press Ctrl+S (Mac: Cmd+S) to save often while you work.
PyReconstruct does not save on a timer. While a series is open, it keeps your unsaved work in a hidden folder next to the .jser file. If PyReconstruct closes without saving (for example, after a crash), it offers to recover that work the next time you open the series. Recovery does not always work, and you might need to go back to your last save. Save often.