 Kristen Harris Lab
Lab W12: Nascent Zones and the Autosegmentation Table
Overview
A nascent zone (NZ) is the part of a PSD that has no presynaptic vesicles docked opposite it. In this lab you:
- Finish and smooth the c-traces of all your d01 synapses.
- Decide, for each synapse, whether it has a nascent zone.
- Trace one nascent zone and show it in 3D over its PSD.
- Fill in the autosegmentation table.
Keep working in the series you proofread in Weeks 10 and 11. For screenshots of errors before you fixed them, use your untouched copy of ZGBJY-D01-autosegmentation.jser from Canvas. The nascent zone goes in panels H and I of Figure 5; see Figure 5 instructions.
For any tool or menu, see the PyReconstruct Guide.
Reset brightness and contrast
The series has a higher contrast on most sections, which makes a PSD hard to tell from the membranes. Set every section back to brightness 0 and contrast 0, the original image.
- Open the Section List: Lists > Section list (Ctrl+Shift+S; Mac: Cmd+Shift+S).
- Click in the list and press Ctrl+A (Mac: Cmd+A) to select every section.
- Right-click and choose Brightness/contrast > Set values....
- Type
0for Brightness and0for Contrast. - Click OK.
You do not need to unlock the sections. If a section still looks too dark or too light, adjust that section alone with the keys - and = (brightness) and [ and ] (contrast).
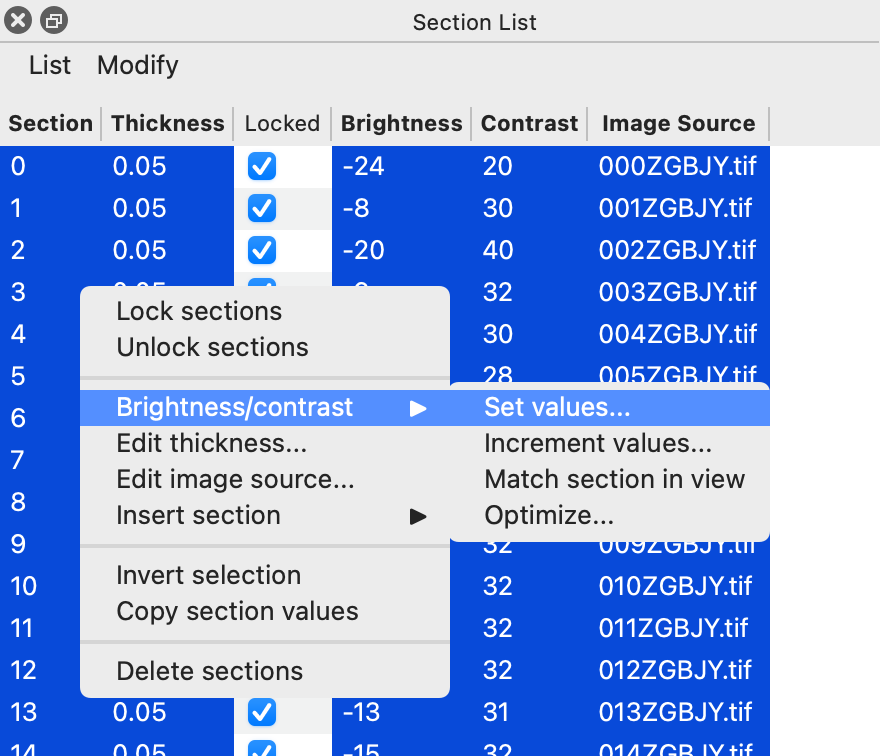
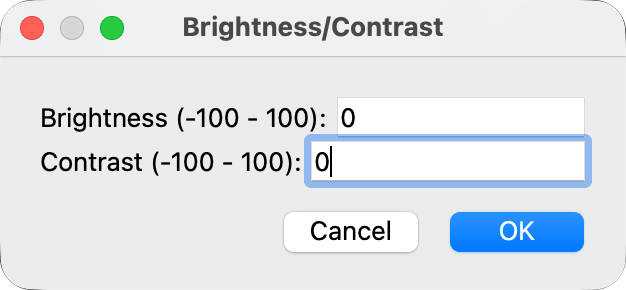
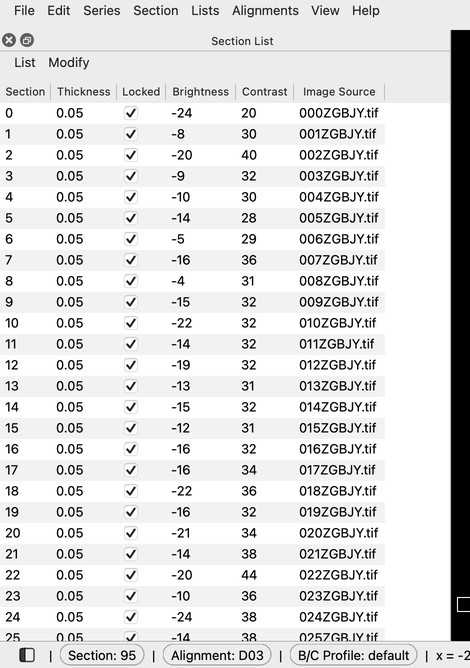
Ctrl+Shift+S (Mac: Cmd+Shift+S), Ctrl+A (Mac: Cmd+A), right-click > Brightness/contrast > Set values..., 0 and 0, OK.
Finish your c-traces
Your synapses are the c-traces you proofread in Week 11:
- d01c01, d01c03, d01c04, d01c05, d01c06, d01c07
- d01c08, d01c09, d01c10a, d01c10b, d01c11
-
d01c12, d01c13, d01c14, d01c15a, d01c15b
-
Check that each c-trace is finished and correct.
- In the Object List, click the first c-trace, then Shift+click the last to select them all.
- Right-click and choose Operations > Smooth object traces.
Look for nascent zones
- Double-click a c-trace in the Object List to go to its first section.
- Go through the PSD one section at a time (Page Up). Look for a part of the PSD with no vesicles docked in the axon across from it.
- Write down yes or no for each synapse, and a section number where you saw the nascent zone.
- Optional: put a stamp there named
d01c##_nzstamp(for exampled01c09_nzstamp) so you can find it again.
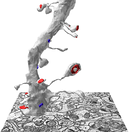
Figure: nascent zones in hippocampal synapses, in EM and in 3D
Bell et al., 2014, Journal of Comparative Neurology. Open the paper.
Trace one nascent zone
Choose one good nascent zone. You trace only this one, for Figure 5.
- Make sure the c-trace of that PSD is accurate.
- Click the c-trace to select it and press Ctrl+C (Mac: Cmd+C).
- Press Ctrl+D (Mac: Cmd+D) to deselect, then press Ctrl+V (Mac: Cmd+V). A copy appears on top of the c-trace, and only the copy is selected.
- Press Ctrl+E (Mac: Cmd+E). In Set Attributes, name it
d01c##_nz(for exampled01c09_nz), pick royal blue, and click OK. - Cut the copy down to the part of the PSD that has no vesicles across from it: press K for the Knife tool, drag across the copy, press P, select the part with vesicles, and press Delete. You can also reshape it with the Scissors tool (Shift+K).
- Repeat on every section where you see the nascent zone.
- Add the c-trace and the
d01c##_nztrace to a 3D scene (right-click > 3D > Add to scene). Make the c-trace translucent: right-click it > 3D > Edit 3D settings..., set Opacity to 0.5, and click OK.
Fill in the table
Download the table "Fig 5 Supplemental Table: Autosegmentation Outcomes" from Canvas. Fill it in with your results from the d01 labs (Weeks 10 to 12). This table goes in your final lab report.
Save and upload
- Save with Ctrl+S (Mac: Cmd+S), and often while you work.
- Upload your .jser file on Canvas before you leave (attendance).