 Kristen Harris Lab
Lab W11: Proofreading Autosegmented Synapses, Axons, and Vesicles
Overview
You have proofread the autosegmented dendrite d01 and its spines. Now you proofread its synapses, three of its axons, and the vesicles in those axons. In this lab you:
- Fix the c-traces of d01's synapses, and trace the one that is missing.
- Fix the traces of axons ax11, ax12 and ax13.
- Name and fix the vesicles in their boutons, and show them as spheres in 3D.
- Note good errors for Figure 5.
Keep working in the series you proofread in Week 10. For screenshots of errors before you fixed them, use your untouched copy of ZGBJY-D01-autosegmentation.jser from Canvas. These errors go in panels C to G of Figure 5; see Figure 5 instructions.
For any tool or menu, see the PyReconstruct Guide.
Proofread the synapses
Synapses were autosegmented across the whole cylinder. Thousands of synapse traces were then removed, leaving only the c-traces of d01's spines:
- d01c01, d01c03, d01c04, d01c05, d01c07
- d01c08, d01c09, d01c10a, d01c10b, d01c11
- d01c12, d01c13, d01c14, d01c15a, d01c15b
(The a and b traces are the two heads of the branched spines d01p10_branched and d01p15_branched. There is no c-trace for d01p02_non.)
Use what you know about PSDs to check each c-trace on every section and fix it. You do not need focus mode for this.
Hint
On one spine with a synapse, the autosegmentation made no c-trace at all. Find that spine and trace its c-trace yourself, named for its p-stamp (for example d01c06 for d01p06).
Tools for c-traces
- Add a missing c-trace: use the Closed Trace tool (C), as in Week 2.
- Trim a c-trace: click the c-trace to select it. Press K for the Knife tool and drag across the c-trace where it should end. Press P, click the extra piece, and press Delete.
- Redraw part of a c-trace: press Shift+K for the Scissors tool and click the c-trace where it goes wrong. Press Backspace to remove points back along the trace, trace the new edge, then right-click to finish.
A common error is a c-trace that runs past the synapse onto a neighboring object.
Proofread the axons
You are assigned 3 axons. Each makes a synapse with one of your spines:
| Axon | Synapses with | Synapse |
|---|---|---|
| ax11 | d01p11 | d01c11 |
| ax12 | d01p12 | d01c12 |
| ax13 | d01p13 | d01c13 |
Proofread and fix the traces of ax11, ax12 and ax13, with the focus mode steps from Week 10: select an axon trace, press X, and fix split errors (Ctrl+click, or Cmd+click on a Mac, then Shift+M) and merge errors (Knife, then Ctrl+click, or Cmd+click on a Mac).
You may stop at the ends of the bouton that makes your synapse. You may also proofread and rename the whole axon if that is easier. Either way, follow the vesicle steps below so the vesicle count for your bouton is right.
Proofread the vesicles
Name the vesicles in each of your 3 boutons after their axon: ax11ves, ax12ves and ax13ves. The steps below use ax12; repeat them for ax11 and ax13.
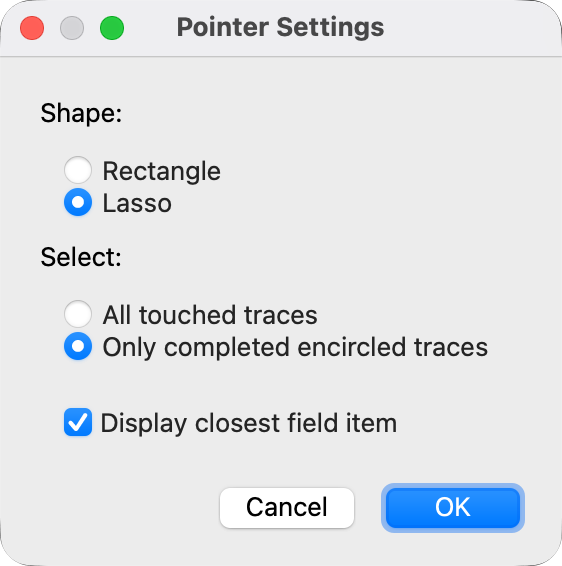
Set the Pointer tool to lasso
- Right-click the Pointer tool. Pointer Settings opens.
- Under Shape, choose Lasso.
- Under Select, choose Only completed encircled traces.
- Click OK.
Name the vesicles on one section
- In the Object List, double-click
ax12. PyReconstruct goes to the first section of ax12. - Go to a section where the bouton has vesicles. Autosegmented vesicles have names such as
auto_vesicles_2126. - Click one vesicle in ax12 to select it, and press Ctrl+E (Mac: Cmd+E). Set Attributes opens for that one trace.
- In Name, type
ax12ves, pick a new color, and click OK. - With that vesicle still selected, press Ctrl+C (Mac: Cmd+C).
- Drag a lasso around all the vesicles in the bouton.
- Press Ctrl+Shift+V (Mac: Cmd+Shift+V) to paste attributes. All the vesicles you lassoed become
ax12ves, in its color.
Fix the vesicles on every section
- Press Ctrl+D (Mac: Cmd+D), then click one
ax12vestrace. - Press X for focus mode.
ax12vesis yellow; everything else is green. - Go to the next section (Page Up). Make the vesicles of the bouton
ax12ves: Ctrl+click (Mac: Cmd+click) each one, or lasso them and press Ctrl+Shift+V (Mac: Cmd+Shift+V). - Look for split vesicles (one vesicle in two traces) and for merged vesicles (two vesicles in one trace).
- Split vesicle: press Ctrl+D (Mac: Cmd+D), lasso just the pieces of that vesicle, and press Shift+M to merge them. The pieces must touch.
- Merged vesicles: press Ctrl+D (Mac: Cmd+D) and lasso the merged trace. Press K for the Knife tool and drag between the two vesicles. Press P to go back to the Pointer tool.
- Not a vesicle: press Ctrl+D (Mac: Cmd+D), lasso the trace, and press Delete.
- Repeat steps 3 to 7 on every section of the bouton.
In focus mode a plain click does not select a trace, so select with the lasso. A Ctrl+click (Mac: Cmd+click) on a yellow ax12ves trace renames it ax12ves_split.
Check the bare image
Press H to hide all traces and see where the vesicles really are. Press H again to show the traces.
Keep only the vesicles of the bouton that makes your synapse.
- If you gave a vesicle of a neighboring bouton the name
ax12ves, Ctrl+click (Mac: Cmd+click) it in focus mode. It is renamedax12ves_split. - Leave the vesicles you did not rename as they are.
Show the vesicles as spheres in 3D
- In the Object List, right-click
ax12ves. - Choose 3D > Edit 3D settings....
- In 3D Object Settings, set 3D Type to spheres.
- Click OK.
If the vesicles are already in a 3D scene, choose Scene > Reload selected in the 3D window to see the change.
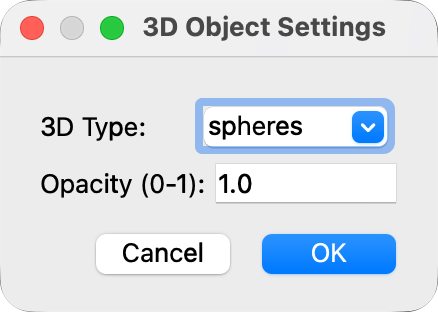
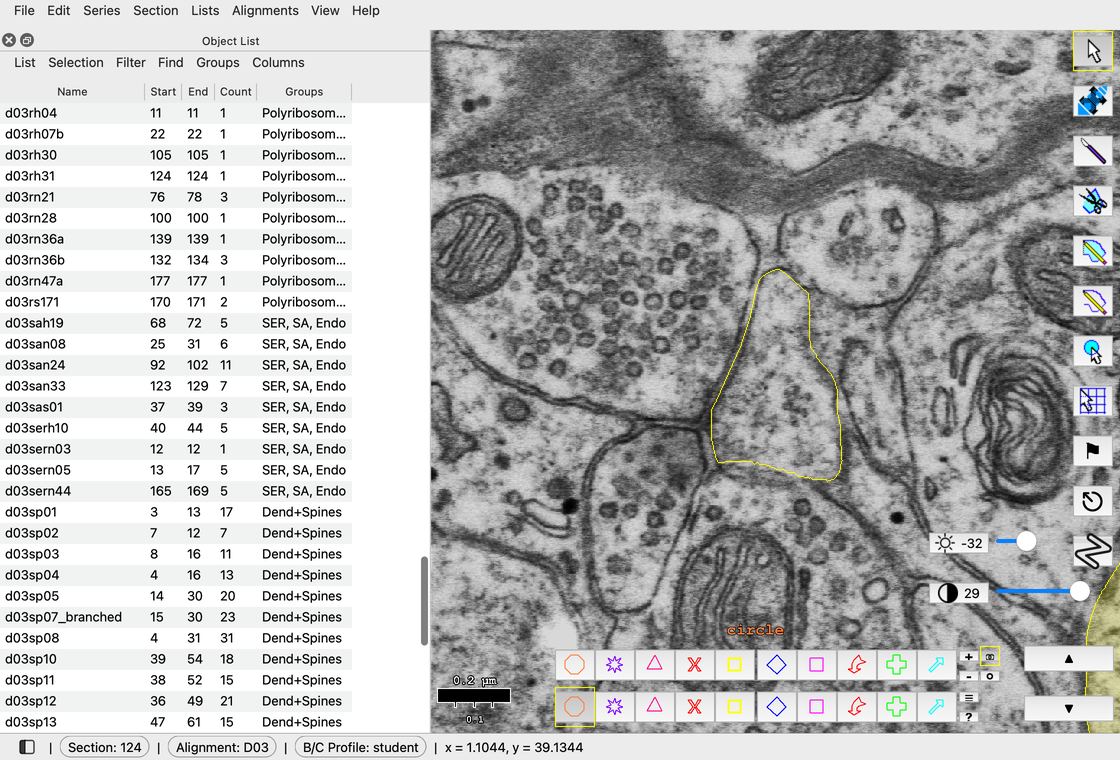
Right-click > 3D > Edit 3D settings... > 3D Type: spheres > OK. Shown on a ribosome object in the D03 series; do the same with ax12ves.
Note errors for Figure 5
Figure 5 needs examples of errors in a spine, a synapse and the vesicles, each before and after you fixed it. Note good errors as you go. You can stamp them with a stamp named error (Stamp tool, S) to find them later. For "before" screenshots, use your untouched copy of the downloaded series.
Save and upload
- Save with Ctrl+S (Mac: Cmd+S), and often while you work.
- Upload your .jser file on Canvas before you leave (attendance).